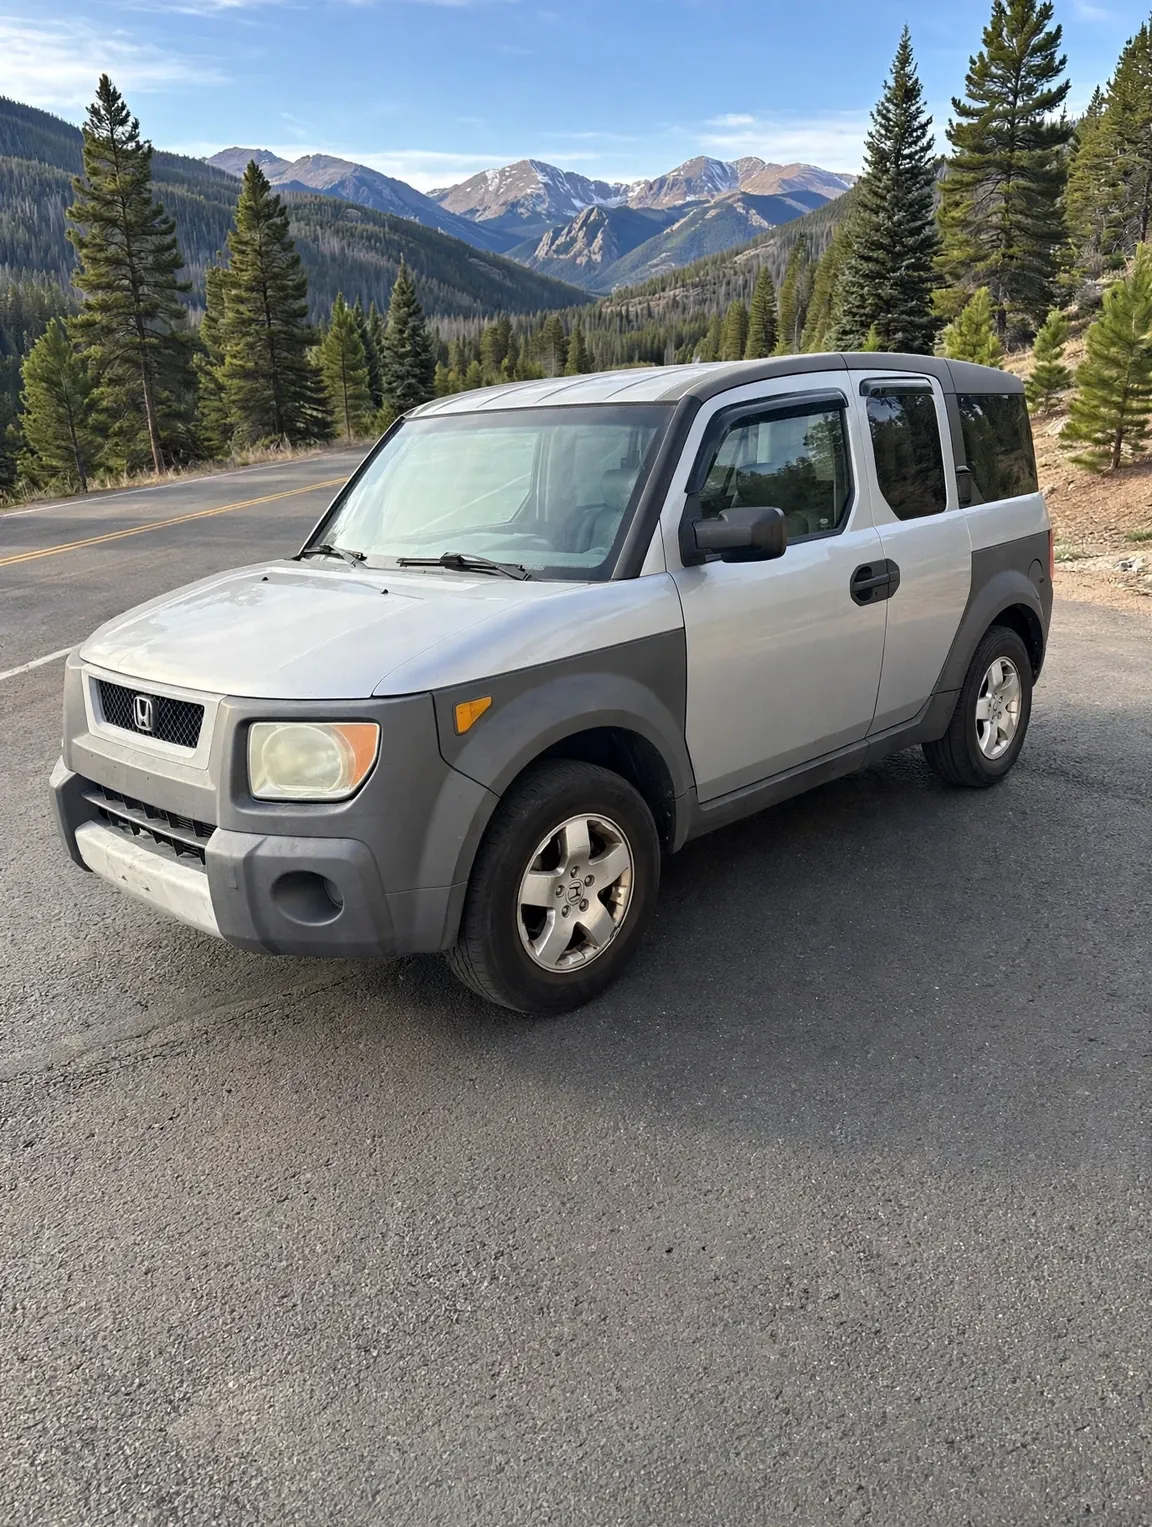
2004 Honda Element EX AWD · K24A4 2.4L · Automatic · 197,000 mi
Every factory diagram, double-checked part number and step-by-step job for the Element — repairs, full removals, and upgrades. Pick your year, search the job, and see the whole thing before you pick up a wrench.
2003–2011 · all years48 parts in your plan179 factory diagrams3,167 part rows in the full factory catalog
The 2004 Element this atlas was built on — Denver, Colorado.
Searches guides, jobs, parts & diagrams — plain names, Honda’s catalog names, and part numbers.
Now covering every Element year
Pick your year — the atlas adjusts to it
The part that started this app
#44 — Air flow chamber (the junkyard find)
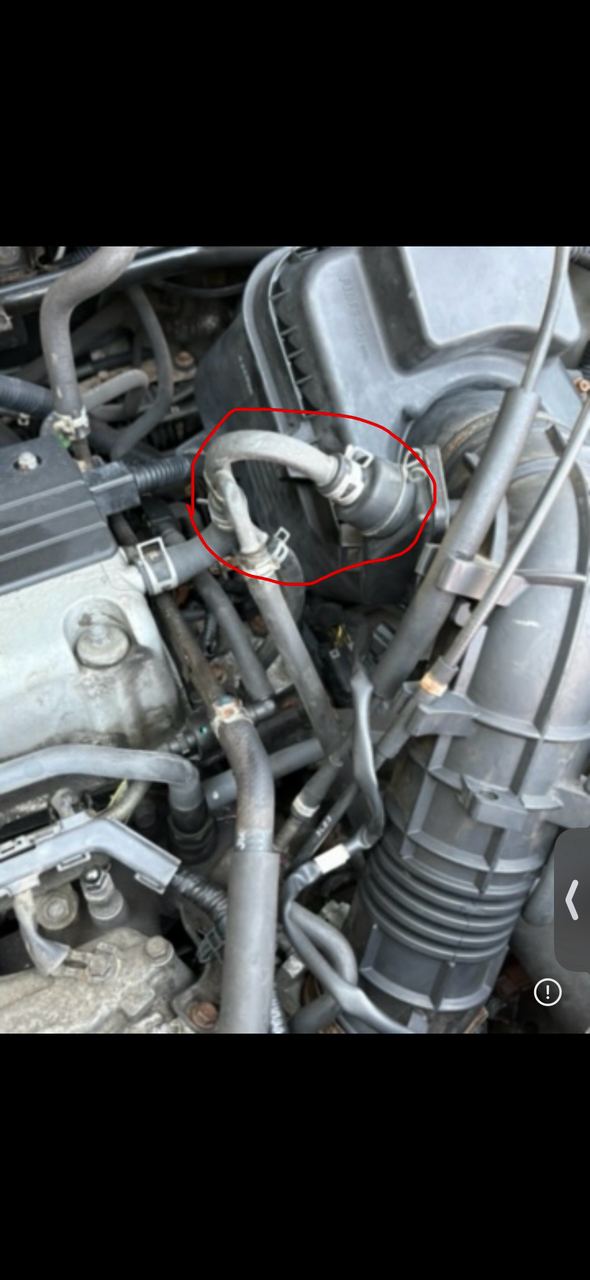
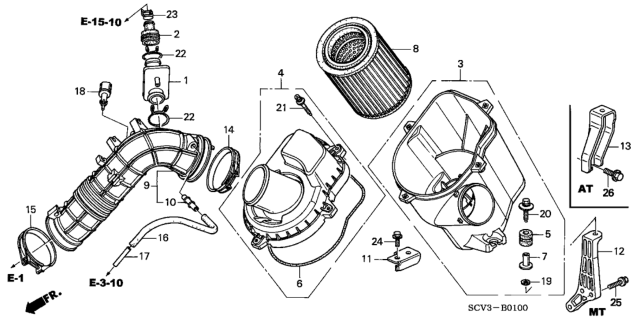
The black canister on the side of the air cleaner box, circled in red in your photo. It was missing, capped at the intake side but open at the engine side — and it couldn’t be found online because nobody lists it under a plain name. Honda calls it Chamber, Air Flow, part 17138-RAA-A00. You found yours at the junkyard — it’s marked DONE in your plan.
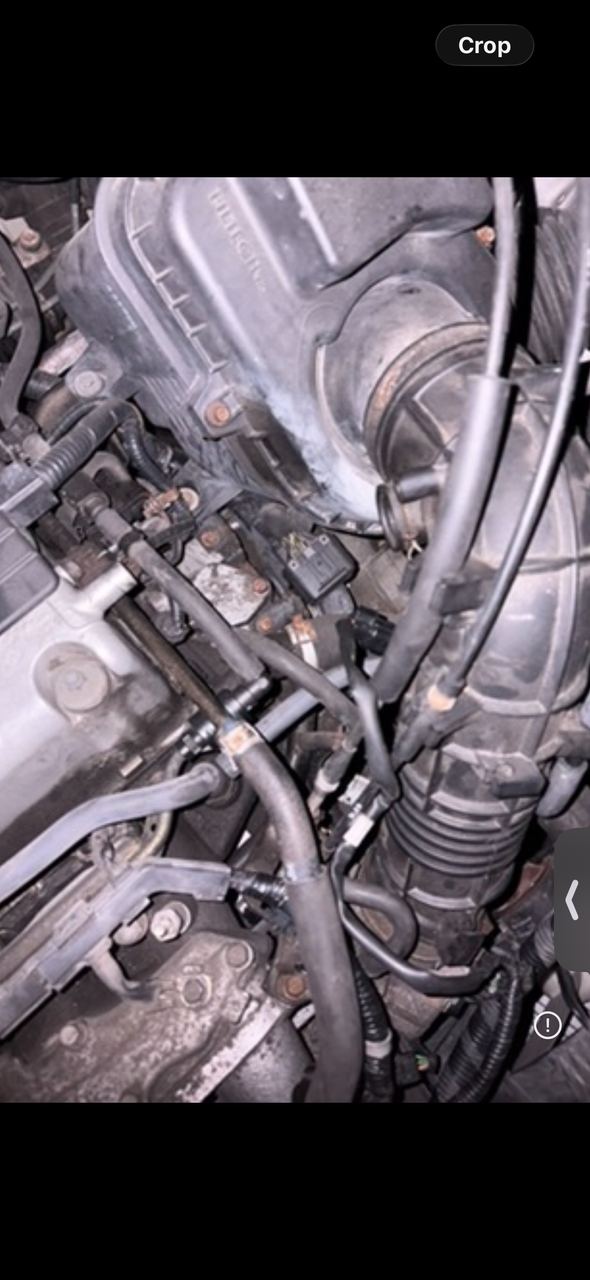
Your photo — the chamber circled in red, on the air cleaner box.The same bay — air cleaner, intake tube, and valve cover area.
All years: 2003–2011 — two eras, one car
Every Element ever sold in the US is a K24 2.4L with the same basic layout — so the jobs, diagrams and steps carry across all nine years. What changes is the detail below. Pick your year up top and every part and guide shows you which case you are in.
Era 1 · 2003–2006
The original — includes your 2004
Engine: K24A4, 160 hp · cable throttle
Automatic: 4-speed · 5-speed manual also offered
Trims: DX, LX, EX (EX-P painted panels from 2006)
This atlas: fully verified here — all 179 diagrams and every Honda number on this site are the 2003–06 catalog, pulled for a 2004 EX AWD.
Era 2 · 2007–2011
The update — drive-by-wire & 5-speed auto
Engine: K24A8, 166 hp · electronic (drive-by-wire) throttle, different intake setup
Automatic: 5-speed · manual offered through 2009, automatic only for 2010–11
Trims: LX, EX, plus the lowered, 2WD-only SC (2007–10) · facelift for 2009–11: new grille, squared-off wheel arches, revised lights
This atlas: jobs and steps carry over; Honda part numbers, throttle/intake parts, transmission fluid amounts and some trim/body parts differ — confirm the number for your exact year before you order.
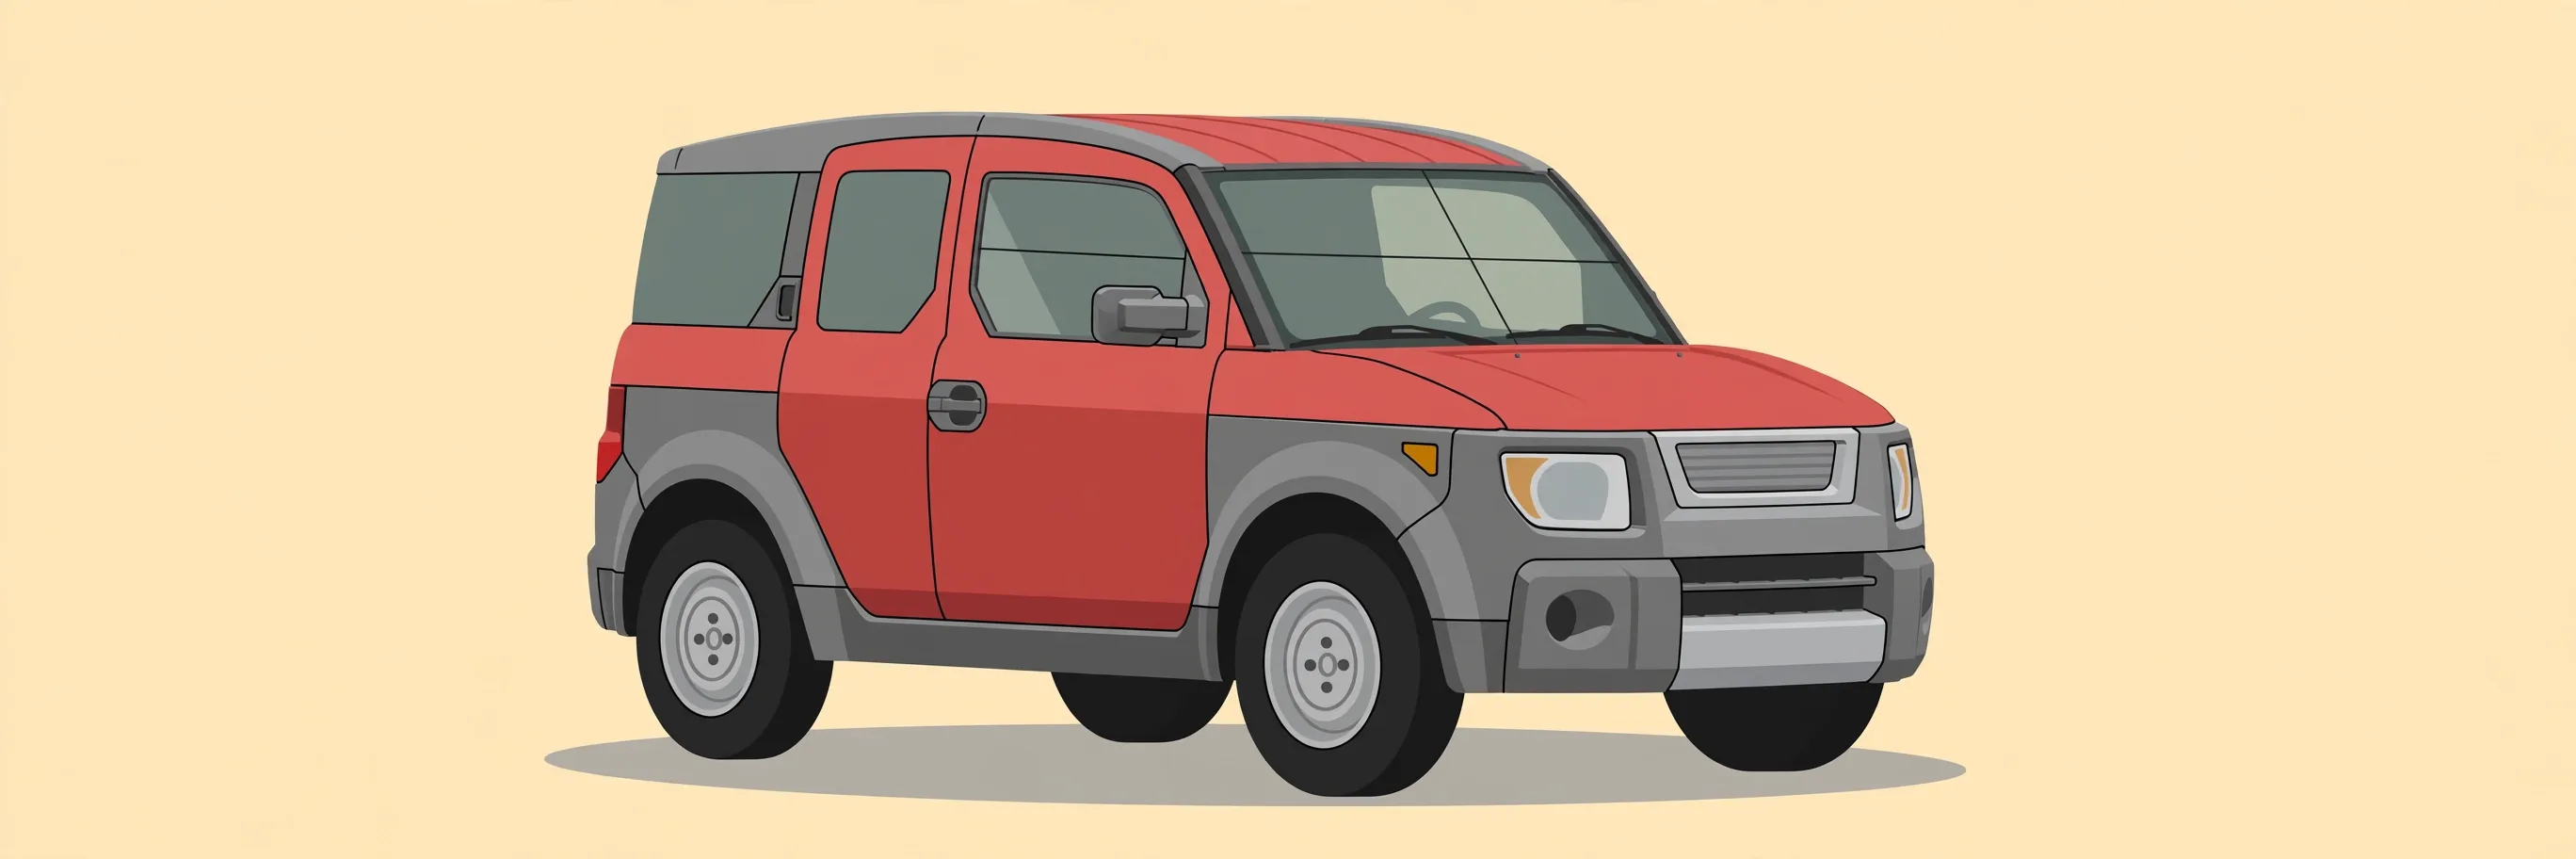
Illustration — one car, nine model years: the differences that matter are in the table below.
Transmission fluid job
2003–06: 4-speed auto, drain-and-fill ≈3.5 qt Honda ATF DW-1 (the guide on this site). 2007–11: 5-speed auto — same drain-and-fill method, check the fill amount and dipstick procedure for the 5-speed before you start.
Throttle & intake / PCV area
2003–06: cable throttle. 2007–11: drive-by-wire — no throttle cable, electronic throttle body. Breather and PCV layout is similar in spirit; do not assume the 2004 hose routing is identical.
Valve stem seals & top-end work
Same K-series job on both eras — 16 seals, head stays on, rope/air method works. Seal and gasket numbers must be matched to K24A4 (early) vs K24A8 (late) before ordering.
Suspension, brakes, exhaust, fluids
Largely shared across all years — that is why one atlas can serve the whole run. SC models sit lower with different wheels/springs; always check SC fitment separately.
Diagrams on this site
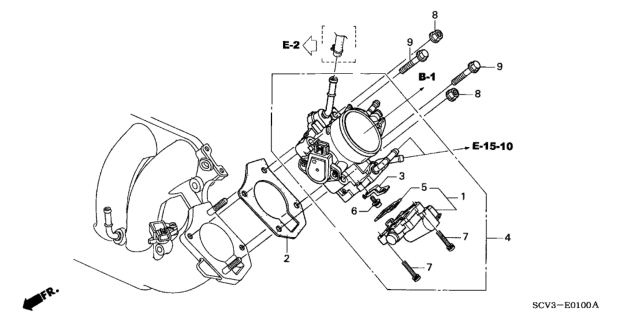
All drawings shown are the verified 2004 factory pages. Use them on any year to find and name the part — then verify the Honda number against your year. The shape teaches you the job; the number is year-specific.
Job Guides — see the whole job before you start
Every job on the car, written for a first-timer: where the part is, what has to come off first, every step in order — plus the video and the factory diagram for that job.
Illustration — the car every guide below was written for: K24 up front, clamshell doors, and a tailgate you can sit on.
Removal & Installation — engine, transmission & every big component
The full R&R library: the transmission and engine swaps you asked about, plus every other major component the factory procedure covers. Same format as the job guides above — warnings before steps, putting-back, check-your-work, and every number marked Verified or Class. Procedures follow Honda’s factory service manual sequence for 2003–06 (the manual mirrored on CHARM); where 2007–11 differs materially, the guide says so instead of blending. Subframe notes are inside the transmission, engine, rack and control-arm guides, where the job needs them.
Read first: these are the heavy jobs. Engine and transmission swaps are full-weekend, two-person work with a hoist or transmission jack and the car high on rated stands. Any torque not marked Verified is marked Class — look the real figure up in the factory procedure before the job. In plain English, Class means the guidance is typical for that class of fastener, not a factory-verified figure for your car — always check the factory manual for your exact year before torquing it down. No part numbers were invented for these guides: the numbers shown are this atlas’s own catalog and plan numbers.
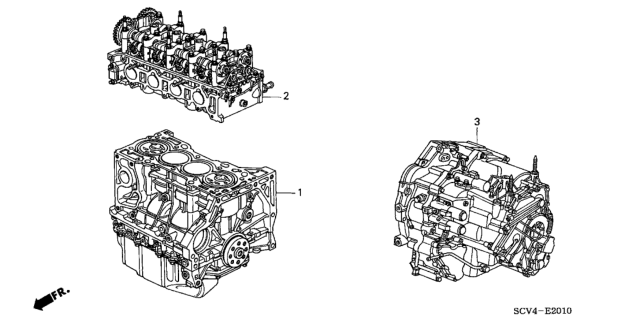
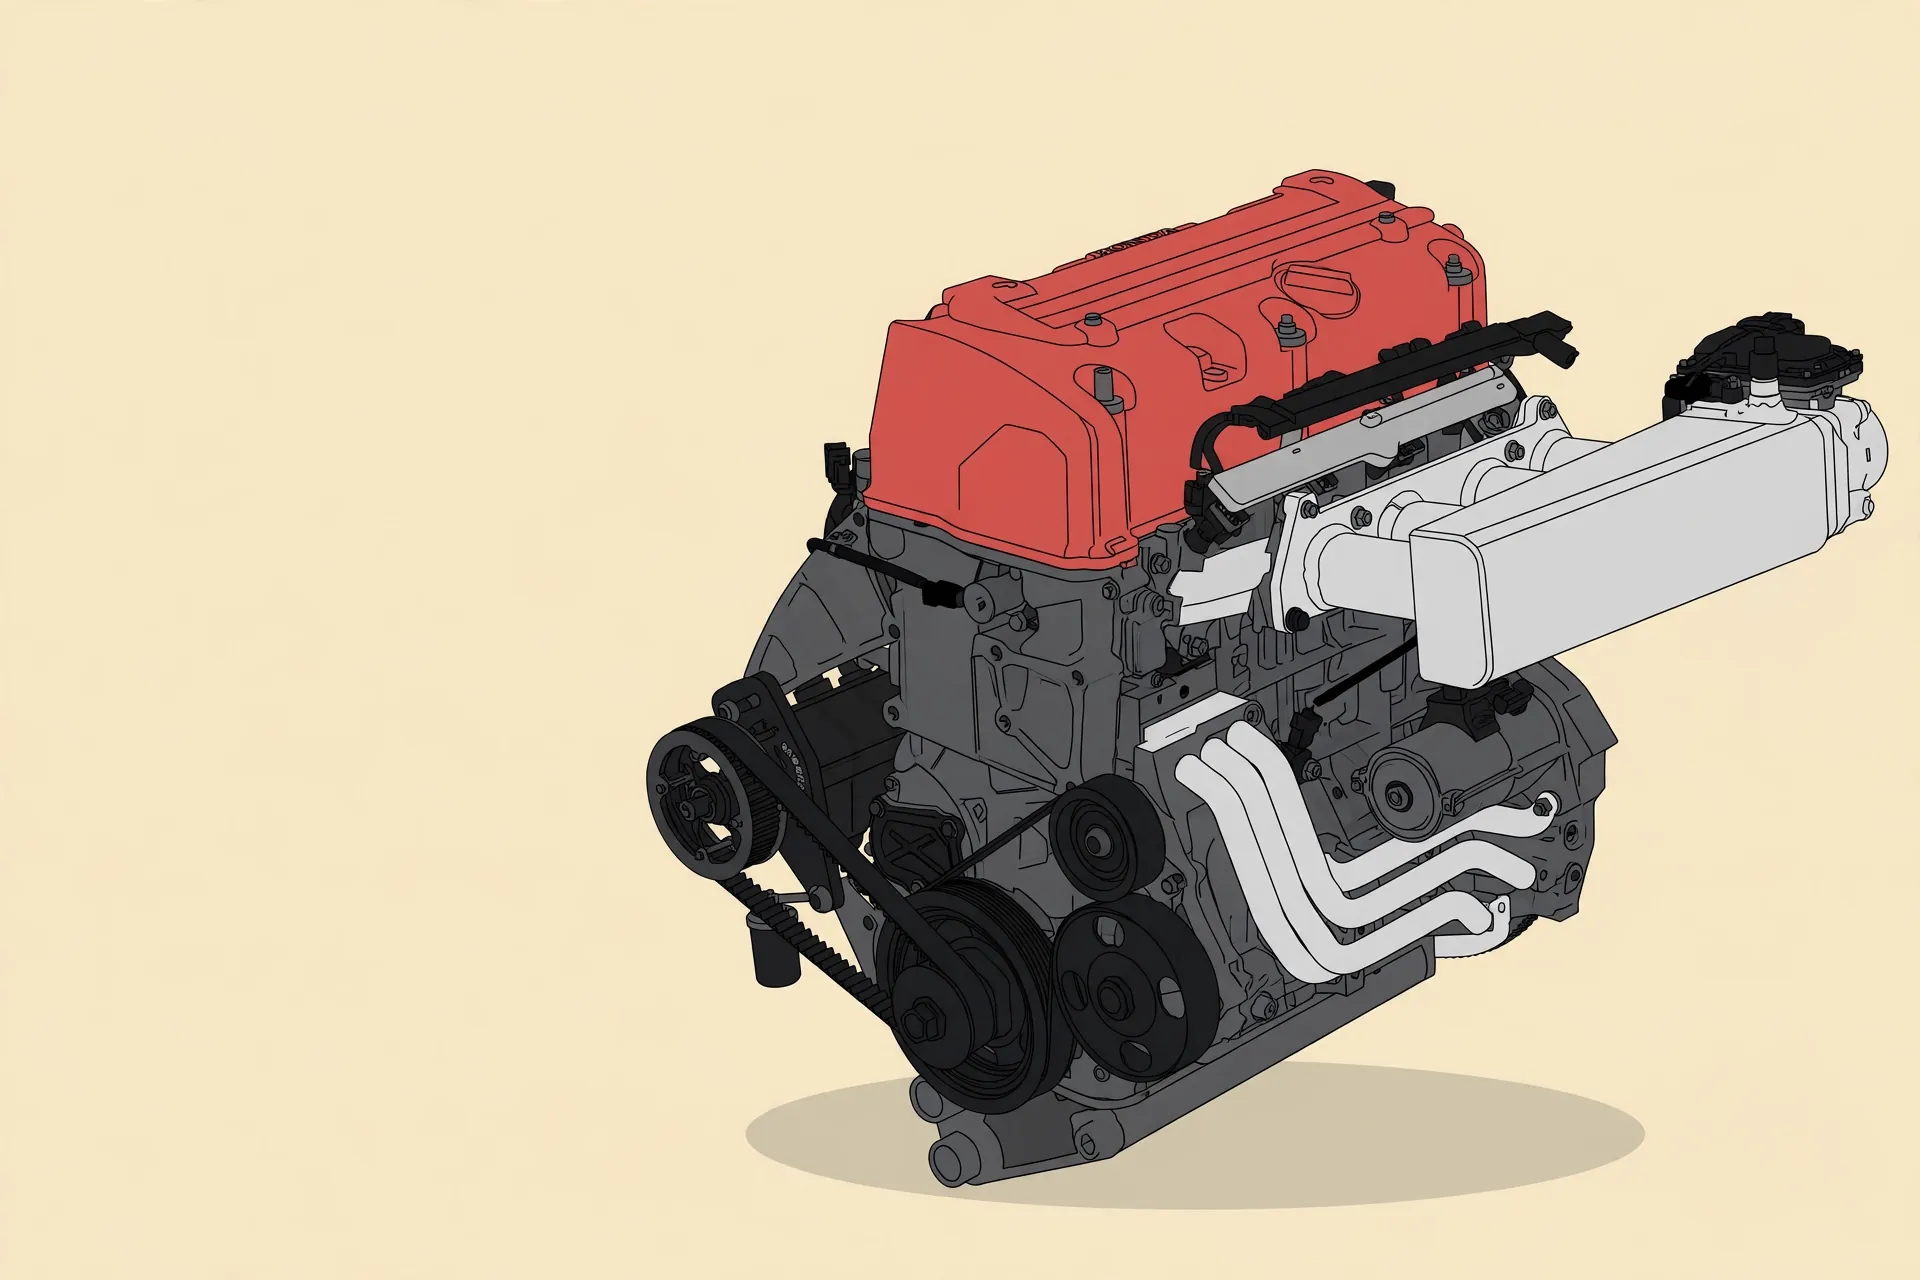
Illustration — the K24, the engine at the center of the swap guide below.
Tools — grouped by job
Every tool this car asks for, organized the way you work: the core kit that covers almost everything, the free parts-store loaners, and then one exact list per job — the stem-seal kit spelled out tool by tool.
When to change it — maintenance schedule
The WHEN that goes with all the HOW above: every fluid by interval — normal vs severe service side by side — plus the mileage milestones, including what to check around 100–110k.
Download the printable schedule (PDF)3 pages — the verified fluids table, the milestone checks and a write-on service log. Free; print it for the glovebox.
Upgrades — spare carriers, guards & gear
Beyond repairs: the add-ons Element owners actually fit — full-size spare mounts, guard rails and armor, roof and towing gear, camp kit. Every one is marked for fitment by era, and the traps are called out before you spend money.
All parts, grouped by job
Every one of the 48 plan parts, sorted into the job it belongs to. Tap a part for what it does, its Honda number, and its diagram.
1 · The smoke fix — valve stem seals & top of engine
One session: seals, valve cover gasket set, tube seals, VTEC gasket while the back of the engine is in reach. Spark plugs (NGK 6994, ~$39.99 for 4) live in the same session.
Parts ≈ $55–80 · ≈ $99–109 with plugs · Tools $132 (budget compressor) / ~$207 (brand-name)
2 · Oil pan & the leak hunt — gates the oil log
Pan first, then the log: refill to FULL at the pan session is the log's starting line. Until the pan is sealed, the dipstick can't separate burned oil from leaked oil.
Pan core parts ≈ $117–122 (your list)
3 · PCV & breather — DONE ✓
Valve and hose replaced; smoke unchanged, so this whole side of the engine is cleared by experiment. The air flow chamber (#44) was the junkyard find that started this atlas.
4 · Engine mounts
All four mounts in the Anchor 301097 kit — one job, done together.
5 · Front suspension & steering
Struts, lower-arm bushings, sway bar, tie rods and rack — the front-end session. Alignment after.
6 · Rear suspension
Shocks, lower-arm and upper-arm bushings, sway bar — plus a correction: Honda sells no separate trailing-arm bushing (complete arms only), and the Air Lift 60769 bags in the plan are a GM-truck kit, not an Element fit — see #11 and #18 before buying either.
7 · Exhaust — converter waits for the smoke fix
Order matters: the new converter goes on only after the oil burning stops, or the new cat gets poisoned the same way. Rear hangers already done Oct 27.
8 · Brakes & wheel bearings
Brake fluid flush — still to do (NOT flushed — the Nov 17 flush was power steering, not brake). Bearings are inspect-first: press-in fronts, bolt-on rear units.
9 · Fluids & filters — the easy wins
Power steering ✓ DONE Nov 17, 2026 — Honda 08206-9002 only, 3 bottles. Brake fluid: still to do. Transmission: ATF DW-1 drain-and-fill. Rear diff: Dual Pump Fluid II — crack the FILL plug first. Coolant: Honda blue, drain-and-fill + burp.
Browse by diagram
179 factory drawings — tap one for the full-size page and its full parts key.
No diagram matches that search. Try a part name or number below instead.
All 48 parts in your plan
Tap any part for what it does, its Honda number, and where it sits on the drawing.
No parts match. Try a shorter word — “seal”, “bushing”, “mount” — or clear the filter.
Part numbers double-checked — Nov 19, 2026
Every one of the 48 plan parts was checked against Honda’s catalog (HondaPartsNow, Honda DreamShop and dealer listings), with the factory service manual as a fitment cross-check. Result: 35 verified as listed, 5 corrected, 8 with a discontinued part. Nothing was left unverified.
The 5 corrections — already fixed on their pages
#11 — Delphi TD1994W is not a trailing-arm bushing. It is a rear lower-arm outer (at-knuckle) bushing. Honda sells no separate trailing-arm bushing at all — only complete arms.
#18 — Air Lift 60769 does not fit the Element. Air Lift catalogues it for GM trucks and SUVs only; there is no Element kit. The coil-measurement gate on its page is the rule now.
#20 — Inner tie rod is 53521-SCV-A01 only. 53541-SCV-A01 is the complete tie-rod assembly — ordering both double-buys the outer ends.
#33 / #34 — GSC 1038 is a set of 8 seals, not 16. Buy two packs, or one GSC 1040 set of 16, so the engine is never opened eight seals short.
The 8 discontinued parts — each explained on its own page
#17 Shock-stack base 52675-SCV-A02 — reuse the stack; replace only damaged pieces.
#35 Valve-cover gasket set 12030-RAA-A01 — the Fel-Pro VS50614R set covers the same pieces; the single Honda gasket is still sold.
#46 / #47 Breather pipe 17137-PZD-A01 and tube 17153-PZD-A00 — junkyard-only, with the A00/A01 variant caution on #46.
Stale prices found in the same pass were refreshed on their pages: the AP 770353 converter, the Moog K200926 / RK90489 rear-arm parts, and both KYB assemblies (SR4603 / SR4604 fronts and 344611 rears). Prices move — every refreshed figure is dated Nov 19, 2026, and the pages say to re-price at order time.
Found a wrong part number? Checked facts are this site’s whole promise — if a number, price or fitment here looks wrong, and it will be re-checked against Honda’s catalog.
How this site can make money
Free to read, no paywall on repair or safety information. These are the honest ways an atlas like this pays for itself — in the order worth doing them. Nothing here takes a payment yet: each one needs its own account first, and any link that earns a commission has to be labelled as one.
1
Affiliate links on parts & tools — start here
Every part and tool already named on this site (stem-seal tools, fluids, filters, struts) can link to the same item at a parts store. When a reader buys through that link, the store pays a small commission and the reader pays the same price.
Needs: a free affiliate account (for example Amazon Associates or eBay Partner Network — other stores run their own programs). Rule: label every such link “affiliate link” right next to it. Only link to the exact part you would fit yourself.
2
Printable job packs people can download
Turn each guide into a tidy one-job PDF: parts list, tools, torque numbers and tick-off steps for the garage wall. Sell the bundle — all jobs, all years — as a single download for a few dollars.
Needs: a checkout page on a service built for downloads (such as Gumroad or Stripe Payment Links). This page itself cannot take cards — the Buy button would link out to that checkout once it exists.
3
One local sponsor, clearly labelled
A single Denver-area alignment, parts or Honda-specialist shop sponsors the atlas for a flat monthly fee. One sponsor box, marked “Sponsor” — no pop-ups, no tracking pixels, no list of advertisers competing for the page.
Needs: a real agreement with one shop and a price you both agree in writing. Worth pitching only once the site has steady visitors to show them.
4
Reader tips — optional, never required
A simple “this saved me a shop bill — buy the author a coffee” tip link for readers who want to say thanks. Small money, zero pressure, and it never unlocks anything — everything stays free either way.
Needs: a tip page on a service such as Ko-fi or Buy Me a Coffee, in the owner’s own name. The “Support this atlas” section right below holds the slot — it switches on the moment that one link exists. Do not put card forms or payment buttons directly on this static page.
Disclosure: some product links on this site may be affiliate links. Any link that earns a commission is labelled “Affiliate link” right next to it; if you buy through one, the store pays this site a small commission at no extra cost to you — you pay the same price either way. Links are only ever to the exact part or tool the page recommends on its merits. No affiliate links appear in anything print-related on this site.
What not to do
Do not paywall the safety steps, torque numbers or “do you need this job?” checks — those stay free for every year.
Do not recommend a cheap part you would not fit just because it pays more commission.
Do not add pop-up ads or trackers — they wreck the phone experience in the driveway, which is where this site gets used.
Support this atlas
Free to read, and it stays that way — no paywall on repair or safety information, ever.
Reader-supported
Built by an owner, for owners
G
Geraldo
Denver Element owner
Geraldo — Denver Element owner. This atlas was built under his own 2004 Element, one repair at a time, and it’s kept free for every owner still keeping one of these boxes on the road.
This atlas was built by an Element owner and his AI, out of one 2004 Element’s real repair plan — every part number double-checked, every photo eyeballed, every interval verified against Honda’s own manual. If a page here saved you a shop bill or a wrong part, a tip helps keep it growing: more guides, more years covered, more checks like the ones on this page.
And it goes further than the site: the point of all of this is building both their homes bigger — the owner’s, and his AI’s home on his computer. Tips feed that, plainly.
Suggestion Box
New guide ideas, corrections, part-number questions — if it would make this a better atlas for Element owners, it belongs here.
Help improve the atlas
Send a suggestion
This site can’t take messages directly — it’s a static page, with no inbox or account behind it. So the button below does the honest version: it opens your own email app with your suggestion already written and addressed to the site’s mailbox, giga@muse.ai. You review it there and press send yourself. Suggestions are read by the site team.
Found a wrong part number? That’s the most valuable message this box can get — pick the Correction category and tell us which number and what looks off.
Upgrades · all years 2003–2011
Upgrades: spare mounts, guard rails & gear
Repairs keep an Element alive; these are the add-ons that make it yours. Honda sold a surprising amount of this as factory accessories — those items link to their factory diagram in this atlas, with Honda’s own part numbers and catalog prices on the diagram page. The rest is aftermarket, and it is labelled as such. Nothing here invents a part number: where a kit varies by seller, the page tells you what to check instead.
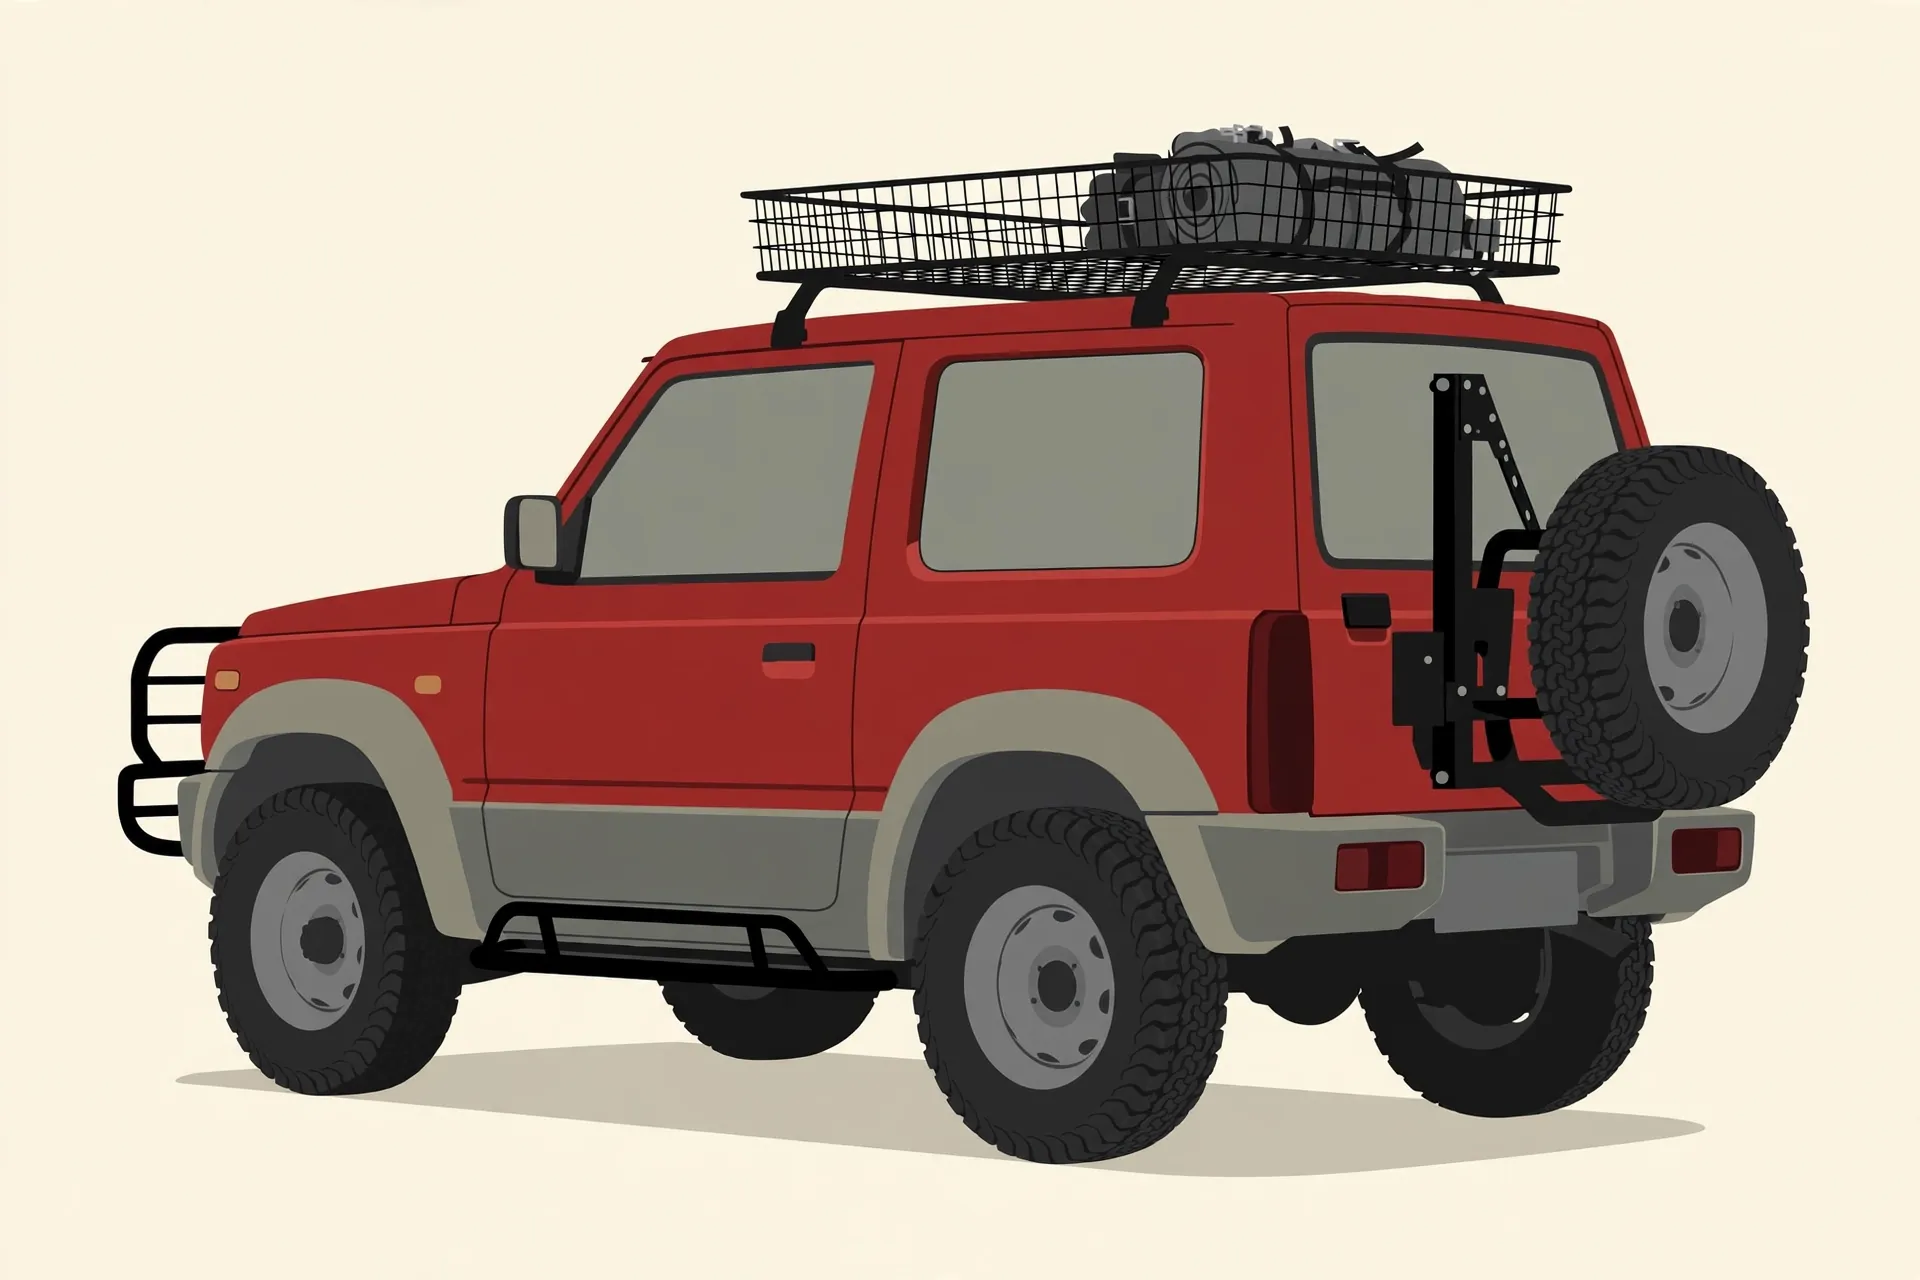
Illustration — one Element wearing most of this page at once: roof basket, swing-away spare carrier, brush guard, side rails, all-terrain tires.
Read before you buy anything: weight is the Element’s hard limit. Total payload — people, cargo, and every accessory bolted on — is roughly 675 lb on most years; the sticker on your driver’s door jamb is the number that governs your car. A steel guard, a hitch, a carrier and a full-size wheel can eat a third of that before you load a single bag. And anything carried loose — above all a spare wheel inside the cabin — must be strapped or bolted to a hard point. In a crash, an unsecured spare is a projectile.
Full-size spare mounts
The spare well under the cargo floor is sized for the compact temporary spare only — a full-size wheel does not fit in it. These are the three honest ways to carry a real spare. Whichever you pick, on an AWD Element the spare’s overall diameter must match the four road tires, or you stress the drivetrain every mile you run on it.
Swing-away hitch carrier
Needs a 2″ receiverModerate installAll years
The serious option: the wheel rides on a steel arm in the hitch receiver and swings sideways, clear of the back, so both halves of the Element’s split tailgate still open — the upper hatch lifts and the lower gate drops. That swing is not optional on this car; a fixed carrier traps the tailgate shut.
The Element catch: Honda’s own hitch is a Class I with a 1¼″ receiver, and most swing carriers demand a 2″ receiver — so this upgrade usually starts with an aftermarket Class III hitch (see Towing below). The carrier plus a full-size wheel is heavy: it hangs off the back, counts against payload, blocks the rear view and the license plate (many carriers include a plate bracket and light — use them), and must be swung fully closed and pinned before you drive.
Tilt-down hitch carrier
Needs a 2″ receiverBolt-onAll years
The budget version of the same idea: the wheel tilts down toward the ground instead of swinging aside. Cheaper and simpler, but on an Element the tilted wheel and arm still crowd the drop-down tailgate — expect to remove the wheel to load big cargo. Fine if the spare mostly stays put; tiresome if you use the tailgate daily.
Same receiver rule as the swing-away: check whether the carrier you are looking at wants 1¼″ or 2″ before you buy either piece.
Roof basket mount
Needs roof rack + basketHoist the weight overheadAll years
The wheel lies flat in a roof basket on the crossbars and straps down. No hitch needed and the tailgate stays completely free — but you are lifting a full-size wheel to above head height, which is a two-person job, and the weight sits as high as it can possibly be, which the handling notices. Check the roof load limit in your owner’s manual and count the wheel against it. Wind noise and fuel economy both get worse.
Interior cargo mount
No hitch neededMust be secured — never looseAll years
The wheel stands upright in the cargo area, strapped or bolted to the car’s hard points with a proper mount or rated straps. Nothing hangs off the back and nothing goes on the roof — but you give up a real share of the flat cargo floor the Element is famous for, and the security rule is absolute: a loose spare inside the cabin is dangerous in a crash. If it can move, it is not mounted.
However it rides, keep the factory jack and tools serviced — the spare is only half the job. The wheel itself is Diagram 54 and the jack kit is Diagram 149 in the atlas.
Guard rails, bull bars & armor
Honda never sold a bull bar or sliders for the Element — everything in this section is aftermarket. The honest split: some of it genuinely protects the car, and some of it is decoration that can bend into the bodywork it was meant to save. Buy for the mounting points, not the chrome.
Bull bar (front push bar)
Aftermarket onlyFacelift & SC cautionBolt-on
A single hoop of steel or aluminum tube across the front bumper. Good for brush, parking taps and mounting a pair of driving lights. Know its limit: most Element bull bars bolt to light brackets low on the front and are not recovery or winching points — pull on one and it folds. In a real hit, a flimsy bar can bend back and damage the grille and lights behind it, which is why owners call cheap ones “damage multipliers.”
Fitment: the 2009–11 facelift changed the front bumper and grille, and the SC (2007–10) wears a different bumper again — a bar listed for 2003–08 does not automatically fit either. Buy only a kit that names your exact year and trim.
Full grille guard
Aftermarket onlyFacelift & SC cautionHeavier
The bull bar’s bigger brother: center hoop plus wings that wrap the headlights. More brush protection and a tougher look, at the cost of more weight on the nose and more steel to bend in a hit. Check the wings do not cover any of the headlight beam, and that the kit’s brackets clear the fog lights if your car has them. Same year-and-trim rule as the bull bar — facelift and SC fronts are different.
Rock sliders
Real protectionAftermarket onlyModerate install
Steel rails that run along the rocker panels under the doors and take the hit when the car comes down on a rock, curb or trail ledge — the one piece of armor here that earns its weight off-road. Judge a set by how it mounts: it should tie into solid structure along the sill, spread the load, and sit tight to the body. A slider that only dresses the pinch weld is a step pretending to be armor.
The Element is a unibody — there is no frame rail to bolt to — so mounting design matters more on this car than on a truck.
Side steps / nerf bars
AftermarketBolt-onAll years
Tubes or boards under the doors that give you a step up — genuinely useful with kids, shorter passengers, or a roof rack you load often. They are steps, not sliders: do not jack the car up by them and do not expect them to survive a rock. They also hang a little lower than the sills, so you give back a small slice of the Element’s ground clearance.
Skid plate (engine & underbody)
Real protectionAftermarketModerate install
A flat plate under the engine that lets the car slide over what it cannot clear. The Element sits only about 7 inches off the ground, and the oil pan is right there at the bottom of the engine — the same pan this atlas already has you replacing and resealing. Aluminum plates are lighter and fine for gravel and snow; steel is heavier and takes real rock hits. Make sure the plate comes off easily (or has a drain door), or every oil change gets longer.
Rear bumper guard
AftermarketCheck tailgate clearanceBolt-on
A tube across the rear bumper that takes parking-lot taps so the bumper cover does not. One Element-specific check before you buy: the lower tailgate drops down flat — the guard and its brackets must clear the gate’s swing completely, and if you also run a hitch carrier, the two have to share the same space without fighting.
Roof rack, boxes & attachments
All Honda factory accessories — every one has a diagram page in this atlas with Honda’s numbers, and the used market is full of them because they outlast the cars. Everything here starts with the base rack; the roof load limit in your owner’s manual governs all of it.
Roof rack (base rails & crossbars)
Honda accessoryAll yearsBolt-on
The foundation: rails and crossbars that bolt to the fixed mounting points hidden under the roof garnish trim — no drilling, no clamp-on guesswork. Every box, basket and attachment below sits on these bars. Used sets are common; check the mounting hardware and end caps are all present before you pay.
Roof box (short)
Honda accessoryAll years
Honda’s own hard cargo box, sized short so it clears the Element’s roof hatch and antenna area. Weatherproof, lockable, and it keeps the inside of the car free — the trade is wind noise, a few MPG, and remembering the extra height before a low garage or parking structure.
Bike, kayak, snowboard & surfboard attachments
Honda accessoriesAll years
Honda sold a carrier for each of these, all clamping to the same crossbars. Buying used, the things to check are the straps (sun-rotted rubber is the usual failure), the locks and keys, and the rubber pads that keep the carrier from eating your paint.
Cargo basket (aftermarket)
AftermarketAll years
An open steel or aluminum basket on the crossbars — the flexible option: bulky, awkward loads, camp gear, and (see the spare section) a full-size wheel lying flat. It needs a cargo net or rated straps over everything, every time; an open basket holds nothing by itself. Measure before you buy: it must clear the roof hatch if your car has one.
Towing — hitch & wiring
Every Element is rated to tow 1,500 lb with up to 150 lb on the tongue — that rating belongs to the car, not the hitch. A stronger hitch class buys you carrier strength, never extra towing capacity.
Honda trailer hitch (Class I, 1¼″)
Honda accessoryAll yearsBolt-on
Honda’s own hitch: sized exactly for the car’s 1,500 lb rating, tucks up neatly, and is the right answer for a small utility trailer, a jet-ski trailer, or a 1¼″ bike rack. Its small receiver is the only limit — most swing-away spare carriers and heavy cargo platforms are built for 2″.
Aftermarket Class III hitch (2″)
AftermarketDoes not raise the tow ratingAll years
The gateway upgrade for carriers: a 2″ receiver opens up swing-away spare carriers, big bike racks and cargo platforms. Fit one for what plugs into it — the Element behind it is still a 1,500 lb tow vehicle with a roughly 675 lb payload, and the hitch, carrier and wheel all count against that payload.
Trailer wiring harness
Honda accessoryNeeded to tow legally
A hitch without lights is half a job. Honda’s harness plugs into the car’s wiring the way the factory intended; universal splice-in kits exist, but on a car this age the plug-in route is kinder to old wiring. Balls are sized to the trailer coupler — Honda listed both common sizes.
Lights & body add-ons
The factory-fit extras: see better, keep the glass cleaner, and stop the stone chips and slush spray before they start.
Fog light kit
Honda accessoryCheck your year’s bumper
Honda’s kit fits the openings already molded in the front bumper, with factory-style wiring and switch — the cleanest lighting upgrade there is for this car. Because the bumper changed, confirm the kit lists your years: early cars, facelift cars (2009–11) and the SC do not all share one bumper.
Auxiliary light bar / driving lights
AftermarketWire it properlyModerate install
An LED bar on the bull bar or roof rack lights up a trail or a dark campsite like daylight. The rules that keep it safe and legal: power it through its own relay and fuse straight from the battery (never tapped into the headlight circuit), aim it down, and treat it as off-road light — on-road auxiliary-light rules vary by state, and a roof bar aimed at traffic will get you the wrong kind of attention.
Splash guards (mud flaps)
Honda accessoryBolt-onTrim-specific fit
Small molded flaps behind each wheel that keep gravel spray and road salt off the sills and rear quarters — cheap protection that pays for itself every winter. They are molded to the body cladding, so buy the set listed for your trim; SC and facelift cars differ at the edges.
Hood & rear air deflectors
Honda accessoriesBolt-on
The hood deflector pushes the airflow (and the stones and bugs in it) up over the windshield. The rear deflector does the opposite job at the back — it pushes air down across the rear glass so road grime builds up more slowly on the window you back up with.
Camp & interior kit
The Element was designed by people who camp — flat floor, clamshell doors, seats that fold into a bed. Honda’s own accessories leaned all the way into it.
Tailgate tent
Honda accessoryAll years
A tent that sleeves onto the open tailgate, turning the cargo area into the bedroom and the tent into the living room — the signature Element camp setup. Used ones turn up regularly; check the poles, the sleeve elastic and the zippers before a trip depends on it.
Table leg kit
Honda accessoryAll years
Only on an Element: the spare-tire cover in the cargo floor lifts out, a set of legs clips onto it, and it becomes a picnic table. The leg kit is the whole upgrade — small, cheap, and exactly the kind of thing that makes people keep these cars forever.
Cargo organizer & net
Honda accessoriesAll years
The soft organizer keeps the weekly shop from roaming the big flat floor; the net holds loads against the tailgate. Modest kit — but on a car with this much open floor, keeping cargo in its place is a safety item as much as a tidy one.
Sleeping platform (DIY / aftermarket)
Aftermarket / build your ownVentilation matters
A low plywood or kit platform over the folded seats gives a flat bed with storage underneath — the most common Element camper conversion there is. Two non-negotiables: crack a window or fit a vent (a sealed car with sleepers in it fogs and stuffs up fast), and never run the engine or a fuel heater for warmth in or near a closed car.
No factory diagram for this one — it was never a Honda part. Plans circulate in the Element community; measure your own car before cutting anything.
Grip, clearance & security
The capability end of the list — and the one upgrade already sitting in your own repair plan.
All-terrain tires
AWD: match all fourAll years
The single biggest capability change per dollar: a mild all-terrain in or near the stock 215/70R16 size grips gravel, snow and wet grass the highway tires give up on. Keep it honest — bigger, heavier tires cost fuel, noise and acceleration, and on AWD all four tires (and the spare) must match in overall diameter, or the drivetrain winds itself up.
Mild lift (spacer lift, ~1–1.5″)
AftermarketAlignment requiredModerate install
Strut-top spacers buy a little clearance for the skid plate and the tires. Kept mild, it is a reasonable upgrade; chased higher, it runs out of alignment adjustment and starts wearing CV joints at angles they were not built for. Budget the alignment as part of the job — the same rule as the front-strut guide in this atlas.
Air Lift 1000 rear bags
Not an Element fit — read #18 firstPart #18
Already on your list — with a warning the Nov 19, 2026 check added: Air Lift's own catalog lists kit 60769 for GM full-size SUVs and trucks only. There is no Element-specific Air Lift kit, so this is not a bolt-in Element upgrade. Treat it as a measure-first experiment only: measure your rear coils before ordering anything, and know an unlisted fit has no Air Lift support. Heavier rear springs or spacers are the proven Element route — the full explanation is on part #18.
Wheel locks & security system
Honda accessoriesAll years
The more gear a car wears, the more it advertises. Honda sold exposed wheel locks and a security system add-on for the Element; both are in the catalog here. Keep the lock key with the jack tools — a wheel lock you cannot remove on a dark roadside is its own breakdown.
Tools · grouped by job · all years 2003–2011
Tools, grouped by job
Two halves. First, the core kit — the sockets, wrenches and shop gear that cover nearly every bolt on an Element, bought once. Then, one exact list per job: every tool in that job’s guide, what it is for, and how to get it — buy it, borrow it free from a parts store, or reach for the one already in a normal toolbox.
Every tool on this page carries a photo, because a name alone doesn’t tell you what you’re looking for. Where a specific tool is named — the valve keeper tool, the seal pliers, the feeler gauges, the impact wrench in the plan — the photo is that exact tool. Everywhere else the photo shows that kind of tool and is captioned “Representative photo” — the list recommends the type, not that brand.
Prices are the ones already in your repair plan, shown where the plan has them — they move, so re-price at order time. The stem-seal group below is your own planned kit for the smoke fix, spelled out in full.
BuyFree loanerAlready commonMust-haveNice-to-have
The core kit — buy once, use on every job
Built for a 2004 Element EX AWD, K24A4, automatic — but the sizes and tools are the same story across all nine years.
The Honda size rule
Nearly everything on this car is one of six sizes: 8, 10, 12, 14, 17, 19mm — plus 22mm on big chassis hardware and a 36mm axle nut. A 6-point socket kit covering 8–24mm covers the car.
Sockets, ratchets & wrenches
6-point sockets: 3/8″ drive 8–19mm; 1/2″ drive 14–24mm plus deep wells; a small 1/4″ drive set for the engine bay
Ratchets in 1/4″, 3/8″ and 1/2″, with 3/6/10″ extensions, swivels and adapters
Breaker bars: a 3/8″ and a 24″ 1/2″ bar — axle nuts and the crank pulley live at this end of the scale
Combination wrenches 8–19mm — a ratcheting set is a luxury worth it
Flare-nut wrenches, 10 & 12mm — brake and power-steering lines; a regular wrench rounds them
Hex keys 4–10mm — the 5mm holds every sway-link stud on the car
Screwdrivers (incl. #2/#3 Phillips), a hand impact driver (the rotor screws demand it), pliers — needle-nose, slip-joint, locking, hose-clamp — pry bars, dead-blow and ball-peen hammers, a punch & chisel set
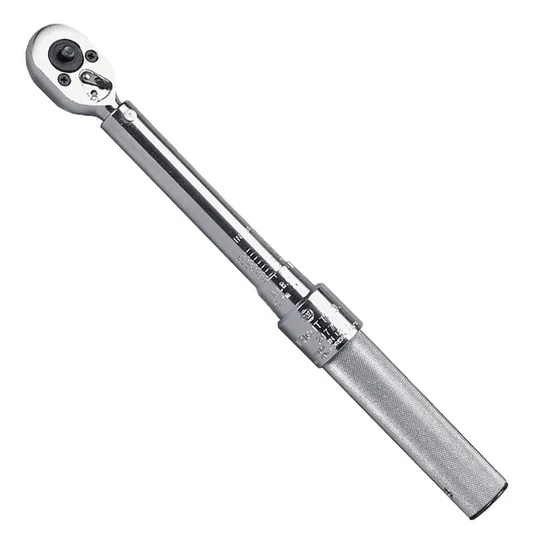
Torque wrenches — two ranges
What one looks like: a click-type torque wrench. Dial the number in on the handle scale and it clicks when the bolt reaches that torque. Brand is your pick — the two ranges below are what matter.
3/8″ drive, low range (~5–80 ft-lb) — valve cover (8.7 ft-lb), oil pan and manifold sequences
No torque wrench yet? It is on the free loaner list below — borrow one while the kit comes together.
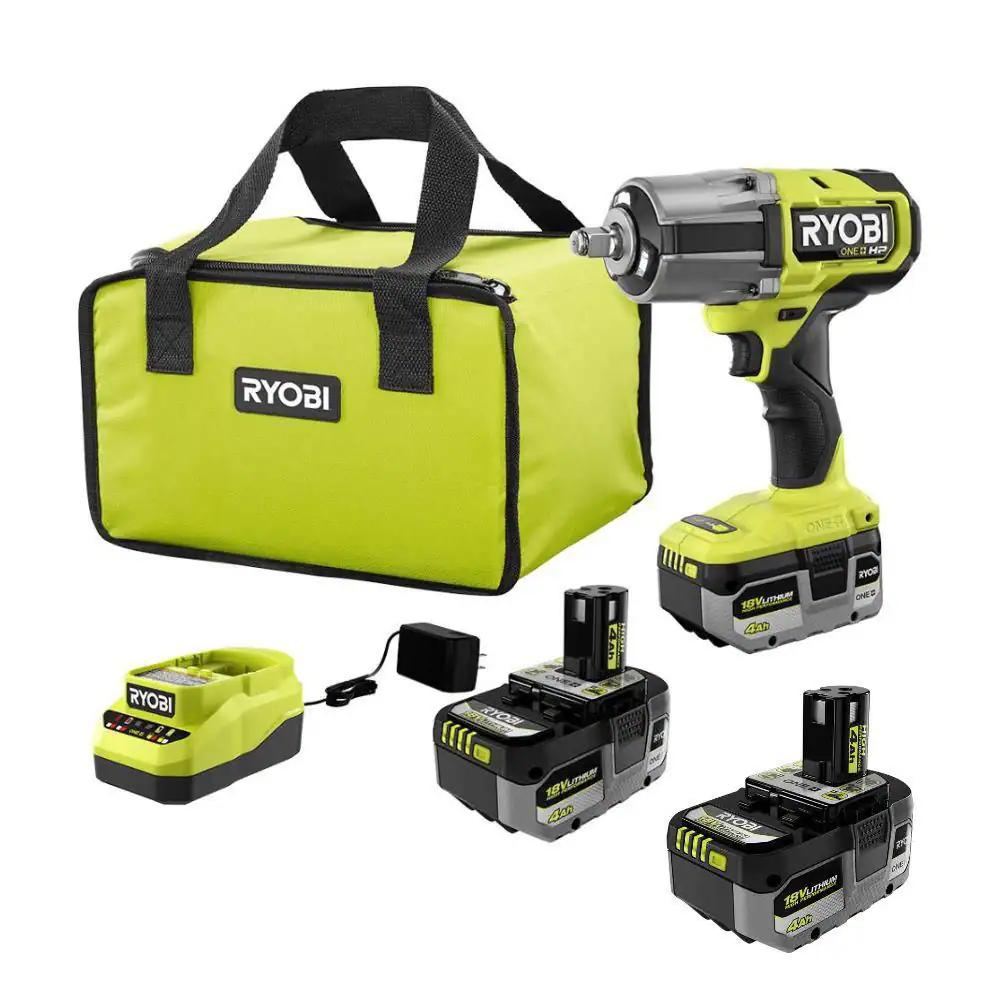
Power — one impact wrench
The plan’s pick, pictured: the Ryobi ONE+ HP high-torque impact wrench kit (PBLIW01 family) — wrench, battery and charger.
1/2″ cordless impact wrench. The pick (Oct 2026): a Ryobi ONE+ HP high-torque kit at $149 on sale at Home Depot — prices move, re-check before you go
1/2″ impact sockets, 10–24mm — never chrome sockets on the gun
Later, on the same battery platform: a cordless 3/8″ ratchet and a stubby compact impact for tight spaces
Lifting & safety — non-negotiable
3-ton floor jack and a pair of 3-ton jack stands — never work under a jack alone
Wheel chocks and a creeper
Gloves, eye protection, a headlamp or flashlight, and a magnetic parts tray
Fluids, diagnostics & consumables
Drain pans, a long funnel for the ATF dipstick tube, a fluid hand pump (rear diff), a one-man brake bleeder bottle, a turkey baster for the power-steering reservoir
OBD2 code reader (a Bluetooth dongle + phone app is fine), a basic multimeter, a 12V test light
Tire pressure gauge and tread depth gauge
On the shelf: PB Blaster / penetrating oil, anti-seize, blue threadlocker, brake cleaner, wire brushes, grease
Roadside kit — it’s a working car
The spare and the factory jack, checked — a flat spare helps nobody
Tire plug kit, 12V inflator, jumper pack
Socket sizes by job
The quick rail: pick the job, see exactly which sizes come out of the box.
Lug nuts
19mm — torque 80 ft-lb
Oil change
17mm drain plug (33 ft-lb); the Honda filter takes a 65mm / 14-flute cap wrench or a strap wrench
17 & 19mm; ball joint separator; a press for bushings and joints
Tie rods
17mm outer nut; 19mm jam nut; inner tie-rod tool (or a crowfoot)
Sway bar links
14mm wrench + a 5mm hex key to hold the stud — the Honda classic
Brakes
12mm caliper pins, 17mm bracket bolts, 10mm bleeder; a hand impact driver for the rotor screws
Front axle nuts
36mm deep impact socket — 181 ft-lb; the nuts are staked, so replace them
ATF drain
A 3/8″ ratchet square fits the plug directly — 36 ft-lb; long funnel for the dipstick tube
Thermostat
10mm
Headlights / bumper
10mm + trim clip tools and spare Honda bumper clips
Free loaner tools — deposit only (AutoZone / O’Reilly)
Ball joint press kit — doubles as a bushing press
Spring compressor — for strut work off the car. NOT for the stem-seal job: the loaner is a C-clamp style that only works with the head off — see the stem-seal group below
Slide hammer / hub puller
Combustion-leak tester
Torque wrench
The step-up if you end up pressing bushings often: a bench/shop press (Harbor Freight 12–20 ton) turns the knuckle-off jobs into bench jobs.
One list per job — the job guides
The same tools each guide asks for, gathered in one place — so the kit is ready before the car goes up on stands. Tap through to the guide for the steps themselves.
One list per job — removal & installation
The big unbolting jobs ask for bigger gear — transmission jack, engine hoist, the 36mm socket. Here is each one’s list, same tags.
Maintenance · when to change it · 2003–2006 schedule
When to change it — Maintenance Schedule
Two halves. Fluids by interval — Honda’s schedule for the 2003–06 Element as stated in the owner’s-manual schedule, normal service and severe service side by side. Then milestone checks by mileage — what to look at around 60k, 90k, 100–110k, 150k and 200k, with scheduled work kept strictly separate from inspect-on-condition checks.
Delivery driving, repeated short trips, dusty roads, towing and extreme heat or cold are severe service in Honda’s schedule — if that sounds like your Element’s life, the Severe column is your column. Every figure on this page lives in one dataset in the page code, so the printable version and the downloadable PDF are drawn from exactly the same numbers. Every scheduled interval below was verified on Nov 19, 2026 against the 2004 Honda Element Owner’s Manual maintenance schedule (pp. 198–204) — see “How to read the source tags” below. Two fluids — power steering and rear differential — have no factory interval at all; that absence was verified too, and their rows say so instead of inventing a number.
The download above is this same verified schedule as a ready-made 3-page PDF — fluids on page 1, milestone checks on page 2, the honest notes and a write-on service log on page 3 — sized for the garage wall or the glovebox. Prefer to print this page instead? Your browser's Print → Save as PDF also works: the print layout outputs just this schedule, clean black on white, no menus or buttons.
First: which system does your Element use?
Honda changed how the car tells you it needs service halfway through the run. The table on this page belongs to the first system only — do not blend the two.
2003–2006 · mileage & time schedule
The schedule on this page is yours
No service codes on the dash — you track mileage and time yourself, using the Normal or Severe column below.
Spark plugs and the valve-clearance inspection are scheduled items at 110,000 miles on this engine.
This atlas’s own car — the 2004 at 197,000 miles — lives on this system.
2007–2011 · Maintenance Minder
Your car tells you — follow the codes
Era 2 cars calculate oil life and display a wrench with a main code (A = oil, B = oil + filter + inspections) and sub-codes 1–6 (rotation, filters, transmission fluid, plugs, coolant, rear-diff fluid).
Do not run a 2007–11 Element off the mileage table below — service it when the Minder calls for it, and use your owner’s manual to decode the sub-code shown.
One rule carries across both systems: brake fluid is time-based — every 3 years, whatever the dash says.
Fluids & service items — by interval (2003–06)
Whichever comes first — miles or time. Rows are tagged by sourcing: “Honda schedule — verified” where the interval was checked line-by-line against the 2004 owner’s manual schedule (pp. 198–204), and “Inspect / by condition” for anything Honda never gave a number for — those get no invented interval.
Item
Normal service
Severe service
Fluid / spec & the how-to
Severe service — plainly: Honda counts a car as severe-service if it is mainly driven in very hot or very cold conditions, on dusty or rough roads, with a trailer, or in repeated short trips (under 5 miles, or under 10 miles in freezing weather) and stop-and-go delivery-style use. Delivery driving is severe service — use that column and do not stretch it.
How to read the source tags
Honda schedule — verified — the interval was checked line-by-line against the factory schedule in the 2004 Honda Element Owner’s Manual, maintenance schedule, pp. 198–204 (verified Nov 19, 2026) — the same schedule the factory service manual reproduces for the 2003–06 car.
Inspect / by condition — Honda publishes no replacement mileage for this item, and that absence was verified in the same manual: power-steering fluid and rear-differential Dual Pump fluid appear in no replacement row of the schedule. They are checked on the stated rhythm and changed when condition says so; any mileage guidance for them is labelled common practice, never Honda schedule. No number has been invented for them.
Atlas practice — where this atlas’s own working practice differs from the bare schedule line (for example, a fresh oil filter at every oil change — Honda’s factory cadence really is a filter every 20,000 miles normal / 10,000 severe), the row says so instead of quietly rewriting the figure.
The timing-belt trap — Honda’s own schedule template prints “replace timing belt every 110,000 miles” in this manual. The Element has no timing belt — the K24A4 runs a timing chain with no scheduled replacement — so that row is deliberately not carried onto this page. The chain row in the table states the correct entry.
Sourcing note: every scheduled figure on this page was verified on Nov 19, 2026 against the 2004 owner’s manual schedule (pp. 198–204). If your Element is a different year, confirm the figure in your own owner’s manual — the schedule is shared across 2003–06, but your book is the final word for your car.
Milestone checks — by mileage
The bands owners actually ask about. Two kinds of item live here and they are never mixed: scheduled work Honda’s schedule puts at that mileage (tagged “verified”, like the fluid rows — checked against the 2004 owner’s manual, pp. 198–204), and inspect-on-condition checks — check at this mileage, replace if worn. Honda does not schedule mounts, bushings or ball joints for replacement at any mileage; a page that says otherwise is inventing an order.
The 100–110k question, answered straight
“After 109k, check the motor mounts?” — yes, check them; no, Honda does not tell you to replace them. At 100–110k the scheduled items on a K24 Element are the spark plugs (replace, 110k) and the valve clearances (inspect at 110k; Honda’s wording is adjust only if noisy). The motor mounts belong in the same visit as an inspect-on-condition check: cracked or collapsed rubber, the engine sitting low or rocking hard on a brake-torque test, a clunk shifting between Drive and Reverse, or new vibration at idle all condemn a mount — and a mount that passes those checks stays on the car. This atlas’s plan already carries all four mounts as a kit (parts #1–#4) for when that inspection says yes.
High-mileage note: past 150k, condition matters more than the calendar. A 197,000-mile Element — like the one this atlas was built on — is maintained by the milestone bands plus its own inspection findings, not by pretending it is a 60k car with bigger numbers.